Showing posts with label Debbie Gaydos. Show all posts

Monday, September 20, 2010

sweet baby girl

When I found out that the September Deal of the Month would have a boy option or a girl option, I just knew I wanted to make a gift for my brother and his wife, who were expecting their first baby, a little girl!  I decided on this altered photo frame.  (The photo in the frame is NOT my brand new niece, who just arrived on Saturday!  For purposes of photographing the project, I put a photo of my oldest son into the frame, for "display purposes" only, lol!)


The awesome Deal of the Month has so much fun stuff in it!  I used some of the fun felt shapes from the "It's a Girl" felt pack, and I just love the fun brads that are also included.  I layered two of the brads along with buttons, die-cut paper and felt, to make these flower centers:


Along with the fun baby goodies in the Deal of the Month, I also used Pink Gradient Gems, a sparkled flower (which I replaced the center of with a pink gem), the fun polka dot ribbon, and the Gradient Pearls.

I also made a card to go with the gift, using another of the It's a Girl brads, more ribbon and a few more gradient gems.


I hope you've enjoyed this project!  You just can't beat the Deal of the Month, so grab it while it lasts!

- Debbie

Tuesday, June 22, 2010

Playtime Boy for a {big} boy's playtime

I had such fun boyish embellishments to play with this month, from the Playtime Boy embellishment pack.  I knew these would be perfect for a layout of the biggest boy in my house ;) playing with his new Lionel trains, on the train table that he recently built.

I used the felt words in the pack to create the title.  That's a page from a Maya Road chipboard album, which I covered in the Bo Bunny Mamarazzi patterned paper to create a fun focal point "base" for my title work.


The train made a fun little accent for the bottom of the page.


And I used punched circles to add some "pop" to a couple of the brads.


I also made a fun little card to share this month:

I accented my card with a couple of the sweet little felt butterflies from Blooming Garden, added a blue Gradient Gem Brad to the center of my flower/sentiment, three Gradient Gem Stickers along the bottom scallop, and some blue Polka Dot ribbon.  I love how quickly these fun embellishments made this card come together!

- Debbie

Wednesday, May 26, 2010

Think Pink: CHA Sneak Peek

I'm so excited to be able to give you a glimpse of this great collection of Creative Charms products! This pink kit is going to be a special deal available next October, in honor of Breast Cancer Awareness month.

When I found out I would get to work with this kit, I immediately knew that I would create something with it as a gift to my friend Chris Hertel, who has been undergoing treatment for breast cancer over the past year. Many of you know her work from her blog, as well as from Creative Charms because she is also a contributor here! She has such an amazing, positive attitude, so when I saw this quote, I knew it was perfect for my project:


The pink kit includes the pink gradient gems that I used to dress up my die-cut letters. I love that the gradient gem packs include an assortment of sizes and colors - I used three of the clear gems to accent the scalloped border at the bottom. The kit also includes the pink gem brads that I used as the centers of my floral elements.

Naturally, I also made a card to go with the gift:


That beautiful pink flower is part of the kit, as is the cute little pink butterfly brad.


And of course, there are the gradient gems again! They really make it so easy to dress up a sweet little card.

I hope you enjoy and are inspired!

- Debbie

Friday, April 30, 2010

Mother's Day is just around the corner!

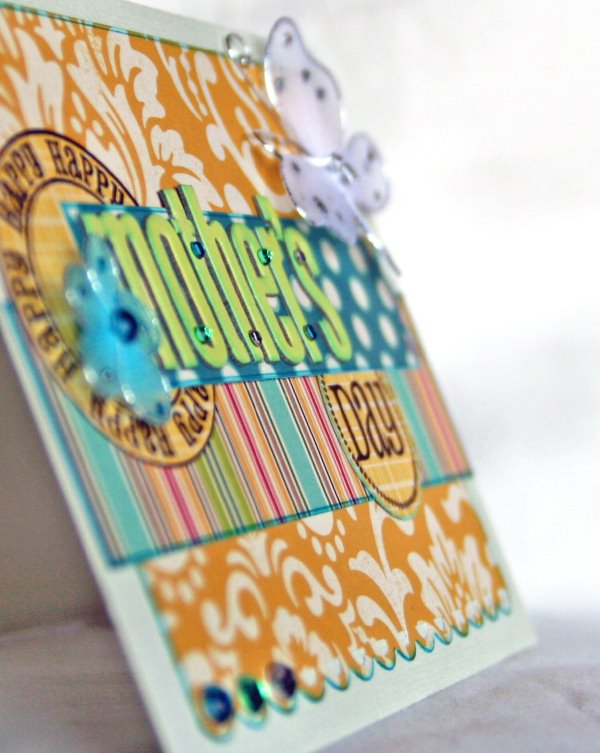
...so what better way to put some of these gorgeous Sparkled Flowers, Sparkled Butterflies, and Gradient Gem Stickers to good use? I made this card for my mother-in-law (shhhh, don't tell her! :). I used gems from both the blue and green packs - I love how they dress up these chipboard letters that have been in my stash forever!


Love the dimension!


Here are some close-ups of the pretty, sparkly goodness:


And with all those great October Afternoon paper scraps left on my table, I put together this easy little multi-purpose card and added the Vintage Brads for that perfect finishing touch!


Thanks for letting me share!
- Debbie
Related Posts Plugin for WordPress, Blogger...